By default, Microsoft preserves the Business OneDrive Personal Data for 30days. However, this can be changed to 3650 days maximum. That means the data can be recovered within 3650 days (10 years) from the date of deletion.
You can change these settings from SharePoint Admin Center
Settings then OneDrive (Retention) then Change the value from 30 to 3650.
On the other hand, you can also check on Set the OneDrive retention for the steps.
Assume that we need to recover the Business OneDrive Personal Data for a particular user. Using Microsoft Purview you can recover the data within retention period.
Pre-requisites:
- You need to have Global Administrator rights to perform this recovery task.
- Use Microsoft Edge browser to avoid any kind of interruptions, usually during the export it will prompt to use the Edge browser.
Steps:
- Go to https://admin.microsoft.com and from Active Users select the user.
- Go to OneDrive tab and click “Create link to files”.
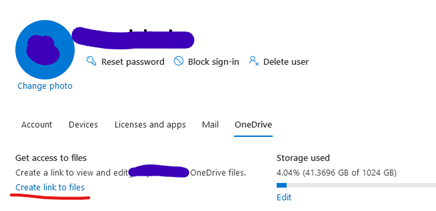
The link will be something like:
https://constoso-my.sharepoint.com/personal/username_contoso_com
- Copy the link and go to https://compliance.microsoft.com
- Go to Content Search and Click on +New search

- Enter the Friendly name for your search and click Next.
- On the Locations Page, enable the toggle for SharePoint Sites and click on Choose sites
- Under the Search paste the Business OneDrive Personal Data Link that we copied in the Step 3, select the link and click, add.
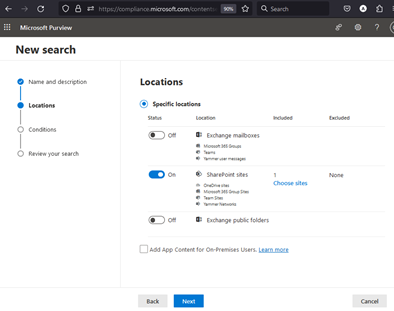
- Click Next, on the Define your search conditions page click Next
- Review your search, click submit and done.
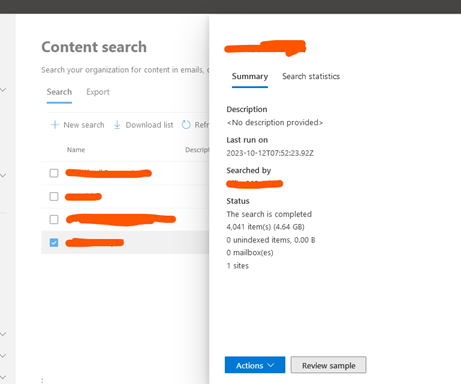
- Click on the Search that you just created under Content Search, wait until it finishes the search, and ready for export.
- Click on Actions then Click on Export results
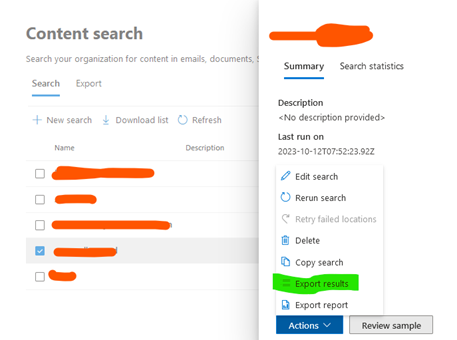
- Under Export results, select one of the output options that best fits your requirement and click export.
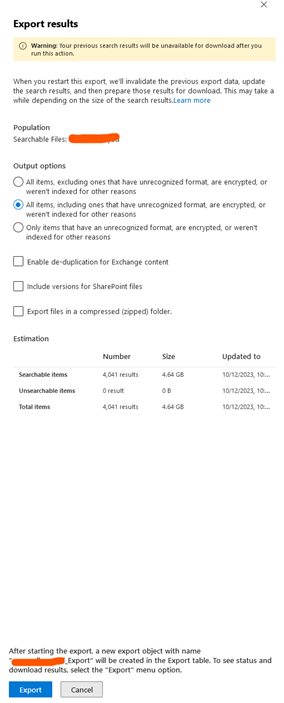
Note: Ignore the warning message in the above screenshot, I am getting this warning message because I repeating the steps to prepare this article. You won’t get this warning message when you are doing it for the first time.
- Then go to Export under Content Search, wait for some time for the content to be ready for export and copy the Export Key in a notepad.
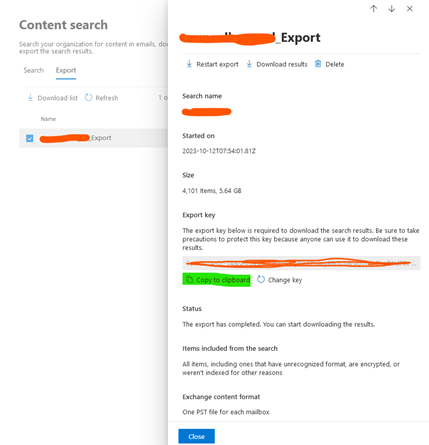
- Once the export is ready for download, click on Download results and it will download and execute an application manifest file.
- Paste the Export key and the local path to export the data.
It may take some time to export the data depending on the internet speed and size of the data.
Once the data is exported, you are done! Cheers