It is a necessary that we retain the company’s data as long as possible for a recovery at any given point in time. Microsoft 365 allows retaining through Retention Policies for Mailboxes. SharePoint Sites, OneDrive content etc… For 10 years through Data Lifecycle Management.
Although a retention policy can support multiple services that are identified as “locations” in the retention policy, you cannot create a single retention policy that includes all the supported locations:
- Exchange mailboxes
- SharePoint sites or SharePoint classic and communication sites
- OneDrive accounts
- Microsoft 365 Group mailboxes & sites
- Skype for Business
- Exchange public folders
- Teams channel messages
- Teams chats
- Teams private channel messages
- Viva Engage community messages
- Viva Engage user messages
Prerequisites:
The global admin for your organization has full permissions to create and edit retention policies or see the permissions information for data lifecycle management.
- From the Microsoft Purview compliance portal, select Data lifecycle management > Microsoft 365 > Retention Policies.
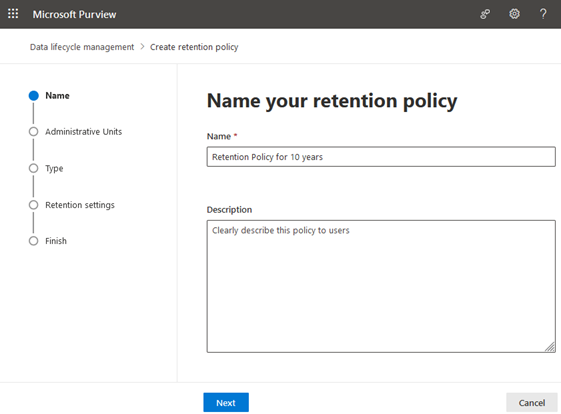
- Select New retention policy to start the Create retention policy configuration, and name your new retention policy and click Next.
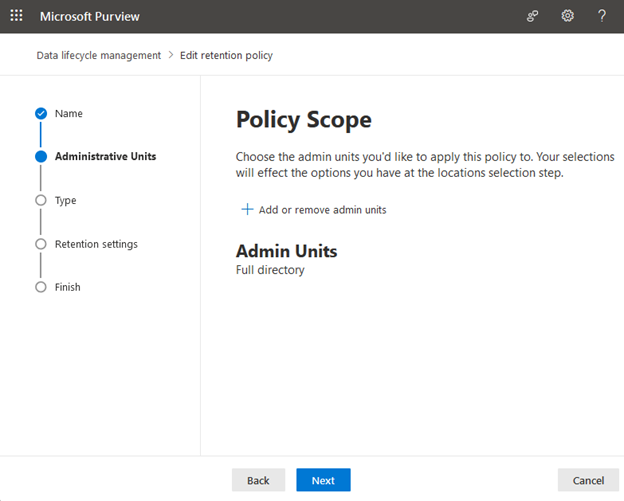
- For the Assign admin units page: This configuration is currently in preview. If your organization is using administrative units in Azure Active Directory, the retention policy can be automatically restricted to specific users by selecting administrative units. If your account has been assigned administrative units, you must select one or more administrative units.
If you do not want to restrict the policy by using administrative units, or your organization has not configured administrative units, keep the default of Full directory.
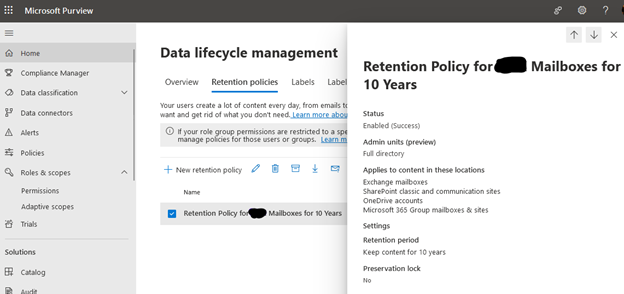
Note: Keep the default settings “Admin Units: Full directory”
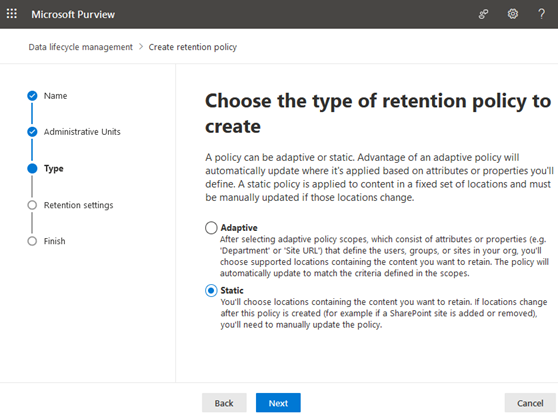
4. For the Choose the type of retention policy to create page, select Adaptive or Static, depending on the choice you made from the Before you begin instructions. If you haven’t already created adaptive scopes, you can select Adaptive but because there won’t be any adaptive scopes to select, you won’t be able to finish the configuration with this option.
5. Depending on your selected scope:
-
- If you chose Adaptive: On the Choose adaptive policy scopes and locations page, select Add scopes and select one or more adaptive scopes that have been created. Then, select one or more locations. The locations that you can select depend on the scope types added. For example, if you only added a scope type of User, you’ll be able to select Teams chats but not Teams channel messages.
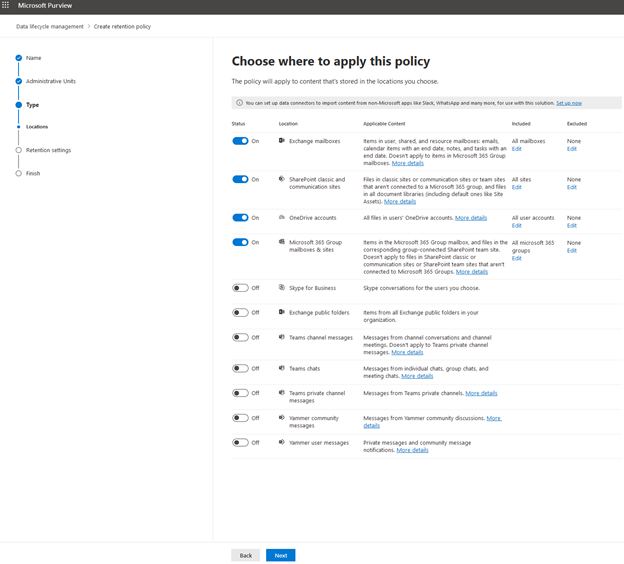
- If you chose Static: On the Choose locations to apply the policy page, select one or more locations for Teams:
- Teams channel message: Messages from standard and shared channel chats, and standard and shared channel meetings, but not from private channels that have their own policy location.
- Teams chats: Messages from private 1:1 chats, group chats, meeting chats, and chat with yourself.
- Teams private channel messages: Messages from private channel chats and private channel meetings. If you select this option, you can’t select the other Teams locations in the same retention policy.
By default, all teams and all users are selected, but you can refine this by selecting the Choose and Exclude options.
If you already have users for whom Archiving is already Active the exclude those users from this policy by clicking Edit from Excluded
Select Static and click Next
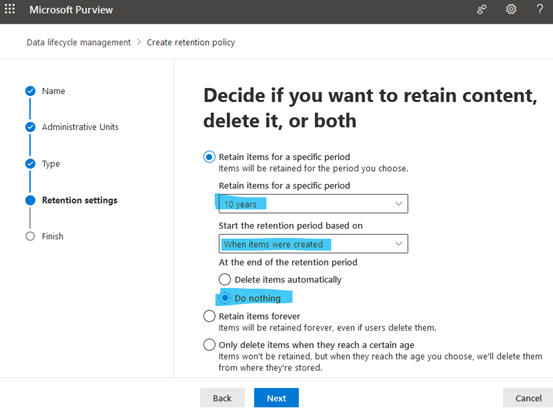
6. For Decide if you want to retain content, delete it, or both page, specify the configuration options for retaining and deleting content.
You can create a retention policy that just retains content without deleting, retains and then deletes after a specified period of time, or just deletes content after a specified period of time. For more information, see Settings for retaining and deleting content.
The above settings are very important, and then click Next.
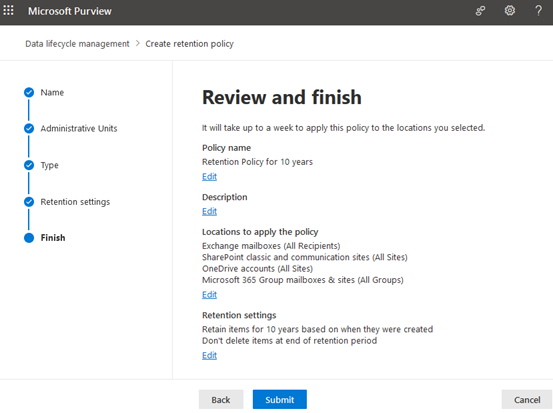
7. Review the configuration and submit your settings.
Note: It will take a week for this policy to come into effect.
Thank you so much for sharing your experience.
We truly appreciate your efforts as this helps us alot.
Thank You Aziz!