My current SSCM environment is running with SSCM 2012 R2 version, the latest version available on Microsoft is SSCM 1810.
After going through lot of articles available online, I found that we can’t just directly upgrade from SSCM 2012 R2 to SSCM 1810. We need follow the baseline versions.
Baseline: Version that you can use to upgrade SCCM 2012 or install a new site. Always use the latest available baseline for these scenarios.
Reference: Microsoft and www.SystemCenterDudes.com
Below are the releases and upgrade path:
| Release | Version | Build | Baseline | Microsoft Link |
| SCCM 2012 RTM | 5.00.7711.0000 | 7711 | N/A | N/A |
| SCCM 2012 RTM – CU1 | 5.00.7711.0200 | 7711 | N/A | KB2717295 |
| SCCM 2012 RTM – CU2 | 5.00.7711.0301 | 7711 | N/A | KB2780664 |
| SCCM 2012 SP1 | 5.00.7804.1000 | 7804 | N/A | N/A |
| SCCM 2012 SP1 – CU1 | 5.00.7804.1202 | 7804 | N/A | KB2817245 |
| SCCM 2012 SP1 – CU2 | 5.00.7804.1300 | 7804 | N/A | KB2854009 |
| SCCM 2012 SP1 – CU3 | 5.00.7804.1400 | 7804 | N/A | KB2882125 |
| SCCM 2012 SP1 – CU4 | 5.00.7804.1500 | 7804 | N/A | KB2922875 |
| SCCM 2012 SP1 – CU5 | 5.00.7804.1600 | 7804 | N/A | KB2978017 |
| SCCM 2012 R2 | 5.00.7958.1000 | 7958 | N/A | N/A |
| SCCM 2012 R2 – CU1 | 5.00.7958.1203 | 7958 | N/A | KB2938441 |
| SCCM 2012 R2 – CU2 | 5.00.7958.1303 | 7958 | N/A | KB2970177 |
| SCCM 2012 R2 – CU3 | 5.00.7958.1401 | 7958 | N/A | KB2994331 |
| SCCM 2012 R2 – CU4 | 5.00.7958.1501 | 7958 | N/A | KB3026739 |
| SCCM 2012 R2 – CU5 | 5.00.7958.1604 | 7958 | N/A | KB3054451 |
| SCCM 2012 R2 SP1 | 5.00.8239.1000 | 8239 | N/A | N/A |
| SCCM 2012 R2 SP1 – CU1 | 5.00.8239.1203 | 8239 | N/A | KB3074857 |
| SCCM 2012 R2 SP1 – CU2 | 5.00.8239.1301 | 8239 | N/A | KB3100144 |
| SCCM 2012 R2 SP1 – CU3 | 5.00.8239.1403 | 8239 | N/A | KB3135680 |
| SCCM 2012 R2 SP1 – CU4 | 5.0.8239.1501 | 8239 | N/A | KB3195483 |
| SCCM 1511 | 5.00.8325.1000 | 8325 | Yes | In Console |
| SCCM 1602 | 5.00.8355.1000 | 8355 | No | In Console |
| SCCM 1602 – UR1 | 5.00.8355.1306 | 8355 | No | In Console |
| SCCM 1606 | 5.00.8412.1007 | 8412 | Yes | In Console |
| SCCM 1606 – UR1 | 5.00.8412.1307 | 8412 | No | In Console |
| SCCM 1610 | 5.0.8458.1000-1007 | 8458 | No | In Console |
| SCCM 1610 – Update 1, FW (KB3209501) | 5.0.8458.1006-1008 | 8458 | No | In Console |
| SCCM 1610 – IU (KB3214042) | 5.0.8458.1009 | 8458 | No | In Console |
| SCCM 1610 – UR (KB4010155) | 5.0.8458.1520 | 8458 | No | In Console |
| SCCM 1702 | 5.0.8498.1007 | 8498 | Yes | In Console |
| SCCM 1702- UR1 (KB4019926) | 5.00.8498.1711 | 8498 | No | In Console |
| SCCM 1706 | 5.00.8540.1000 | 8540 | No | In Console |
| SCCM 1706 – Update 1, FW (KB4039380) | 5.00.8540.1005 | 8540 | No | In Console |
| SCCM 1706 – Update 2, FW(KB4036267) | 5.00.8540.1007 | 8540 | No | In Console |
| SCCM 1706 – UR1 (KB4042949) | 5.0.8540.1611 | 8540 | No | In Console |
| SCCM 1710 | 5.00.8577.1000 | 8577 | No | In Console |
| SCCM 1710 UR1 (KB4057517) | 5.0.8577.1108 | 8577 | No | In Console |
| SCCM 1710 UR2 (KB4086143) | 5.0.8577.1115 | 8577 | No | In Console |
| SCCM 1802 | 5.00.8634.1007 | 8634 | Yes | In Console |
| SCCM 1802 UR (KB4163547) | 5.0.8634.1813 | 8634 | No | In Console |
| SCCM 1806 | 5.00.8692.1003 | 8692 | No | In Console |
| SCCM 1810 | 5.00.8740.1003 | 8740 | No | In Console |
To upgrade my environment I will follow the below sequence to reach to the latest version.
SCCM 2012 R2 > SCCM 2012 R2 SP1 > SCCM 1606 > SCCM 1702 > SCCM 1802 > SCCM 1810
Prerequisites
Always go through the Prerequisites required before you perform any upgrade.
I will recommend to backup the SSCM SQL database and take the Snapshot/Checkpoint of the SSCM if it is running on a Virtual Machine.
Database Replication
If you have a database replica configured for management point, disable Database Replication. If you don’t use this function, skip this step and go to the Backup and Testupgrade section
- Open the SCCM Console, go to Administration > Site Configuration > Servers and Site System Roles
- Select the Site System that hosts the management point that uses the database replica
- Right click Management point and select Properties
If you are using Database Replica, then:
- Login to the SQL Server where the replica database is hosted and open SSMS (SQL Server Management Studio).
- Go to Replication > Local Publications
- Right click the replica database and select Delete. Select Yes to the warning.
- Right click on the publisher database and select Delete. Select Close existing connections and click OK
- Connect to the SQL server hosting the site database
- Open SQL Server Management Studio
- Go to Replication and select Disable Publishing and Distribution
- On the next screen, click Next
- Select Yes, disable publishing on this server and click Next, Next, Next
- Click Finish
Backup and TestUpgrade
- Before upgrading, perform a backup of your SCCM database.
- It is recommended to test your CM database before the upgrade. Detailed procedure is available on TechNet, here’s the resumed version :
- Backup your site database
- Restore it on a SQL server running the same version as your SCCM SQL instance
- On the SQL server, run the SCCM setup command line using the Testdbupgrade switch
- Open the log file on C:\ConfigMgrSetup.log
- If the process is successful, you can delete the database copy
- If you have errors, resolve them on your SCCM server, do a new backup and restart this procedure
After you successfully upgrade a copy of the site database, proceed with the “real” upgrade.
In this post I will cover step-by-step the upgradation of the Standalone Primary Site SCCM2012R2 to SSCM2012SP1, which quite simple. You need to down the SSCM2012SP2 in order to upgrade the SCCM2012R2 to SCCM2012R2SP1.
Download the ISO media from your VLSC account or you may get the evaluation version from Microsoft Evaluation Center.
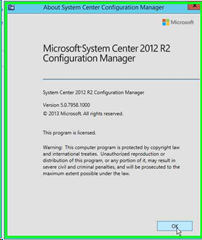
- The current version of the existing SSCM 2012 R2 before the upgrade:
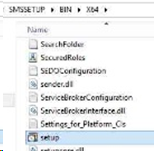
- Extract SC2012_SP2_Configmgr_SCEP and Run the Setup from the following path:
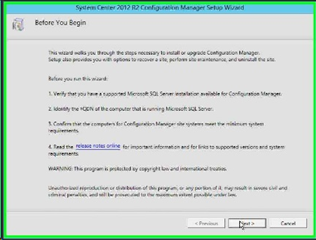
- On the Before You Begin window click Next
- On the Getting Started window, make sure you select Upgrade the Configuration Manager site an click Next
- On the Microsoft Software License Terms select I accept these license terms and click Next
- On the Prerequisite Licenses windows Select all the I accept options and click Next
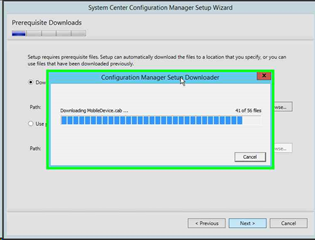
- On the Prerequisite Downloads windows select path to Download required files and click Next
- Prerequisite Downloads in progress
- On the Server Language Selection window, select the language and click Next
- On the Client Language Selection window, select the language and click Next
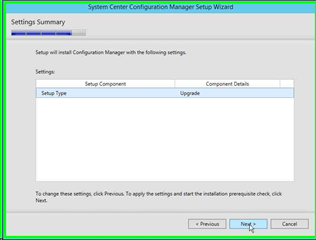
- On the Setting Summary select Setup Type and click Next
- On Prerequisite Check windows all the checks should pass successfully then click Begin Install
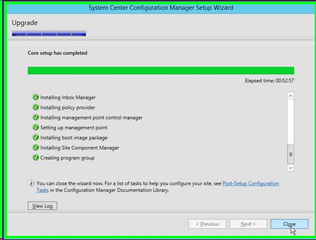
- Upgrade is under progress
- When the Upgrade process is completed click Close
- Refer to logs as well if required as shown below
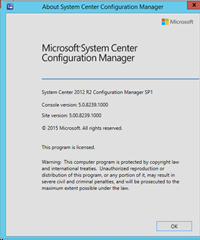
- Open the SCCM management console got to File > About and check the version
Check the latest build version under SCCM Console using the following path.
- Go to Administration / Site Configuration / Sites
- Right-click your site and select Properties
- The Site Version and Build Numbers has been upgraded to 5.00.8239.1000
Upgrading the client with the latest build automatically, follow these steps:
Go to Administration > Site Configuration > Sites > Hierarchy Settings > Select Client Upgrade tab and apply as shown below, you can also change the days for the client updates.









very good perfect completed updated solution